

The Hidden Grid

Task Card
The Grid
In this task, you’re going to make a square grid out of… circles.
Circles?!
Yes. Circles.
How is that possible?
Orin thinks it’s magic. Smudge agrees. Biscuit is not ready to rule anything out.
Let’s see for ourselves.
Need Help?
Steps
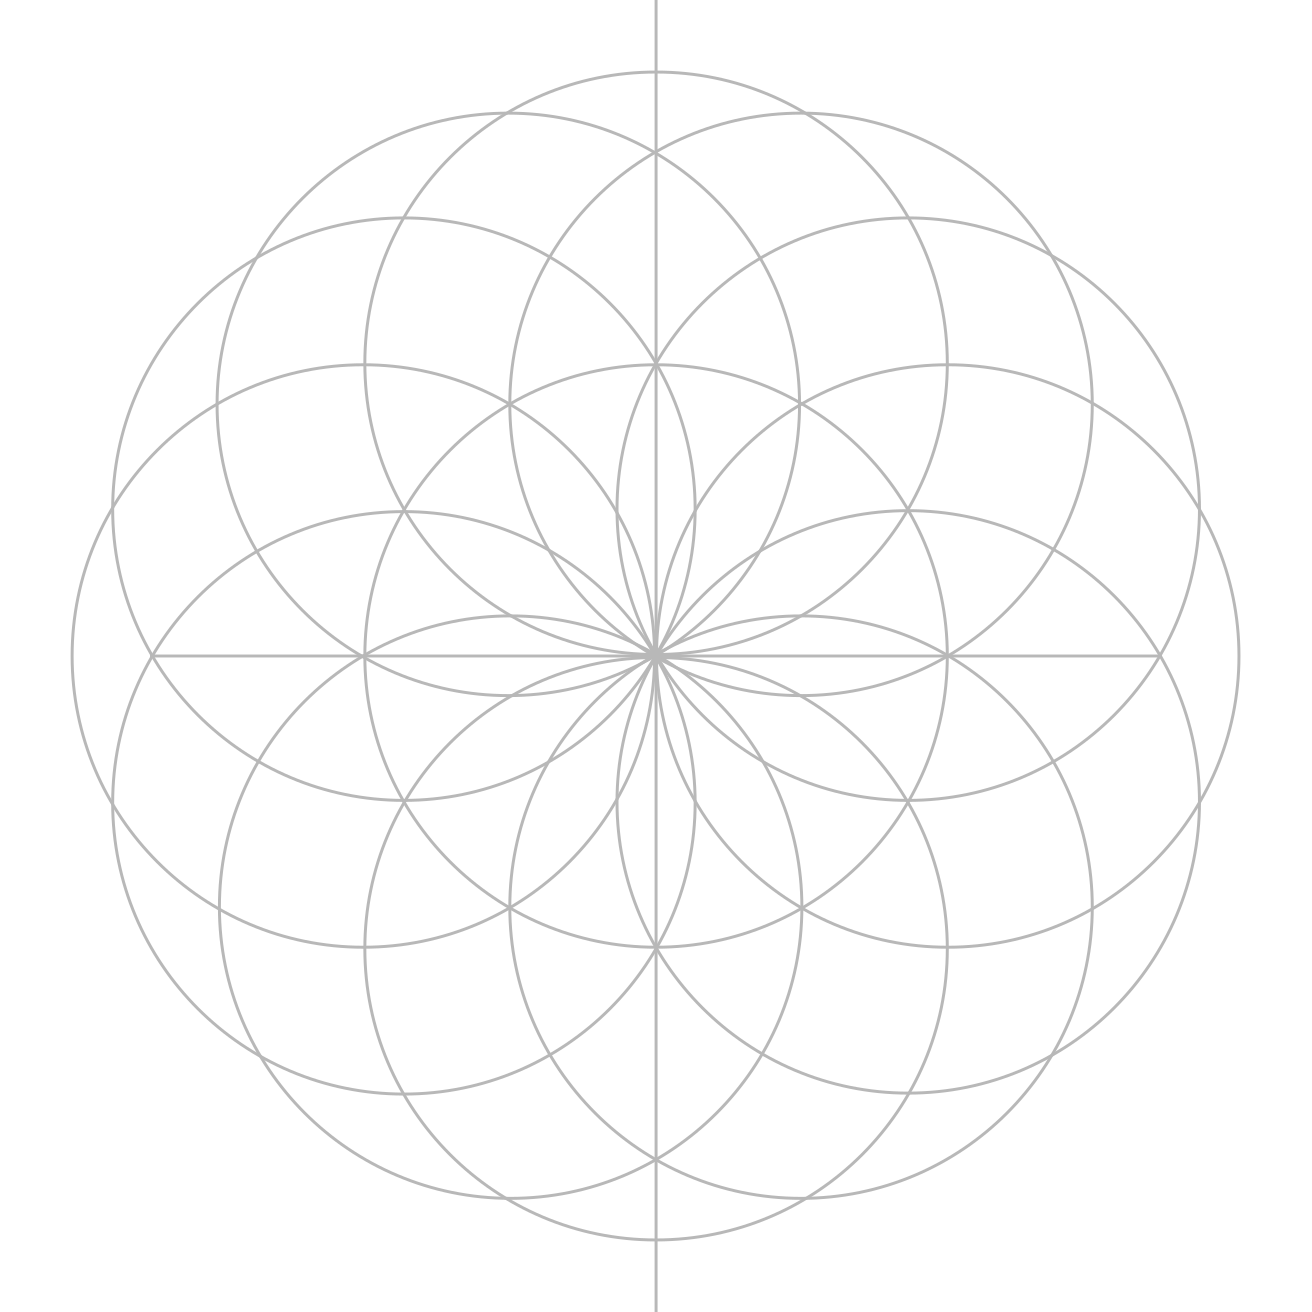
Begin with the Seed of Life
Begin with your completed Seed of Life.
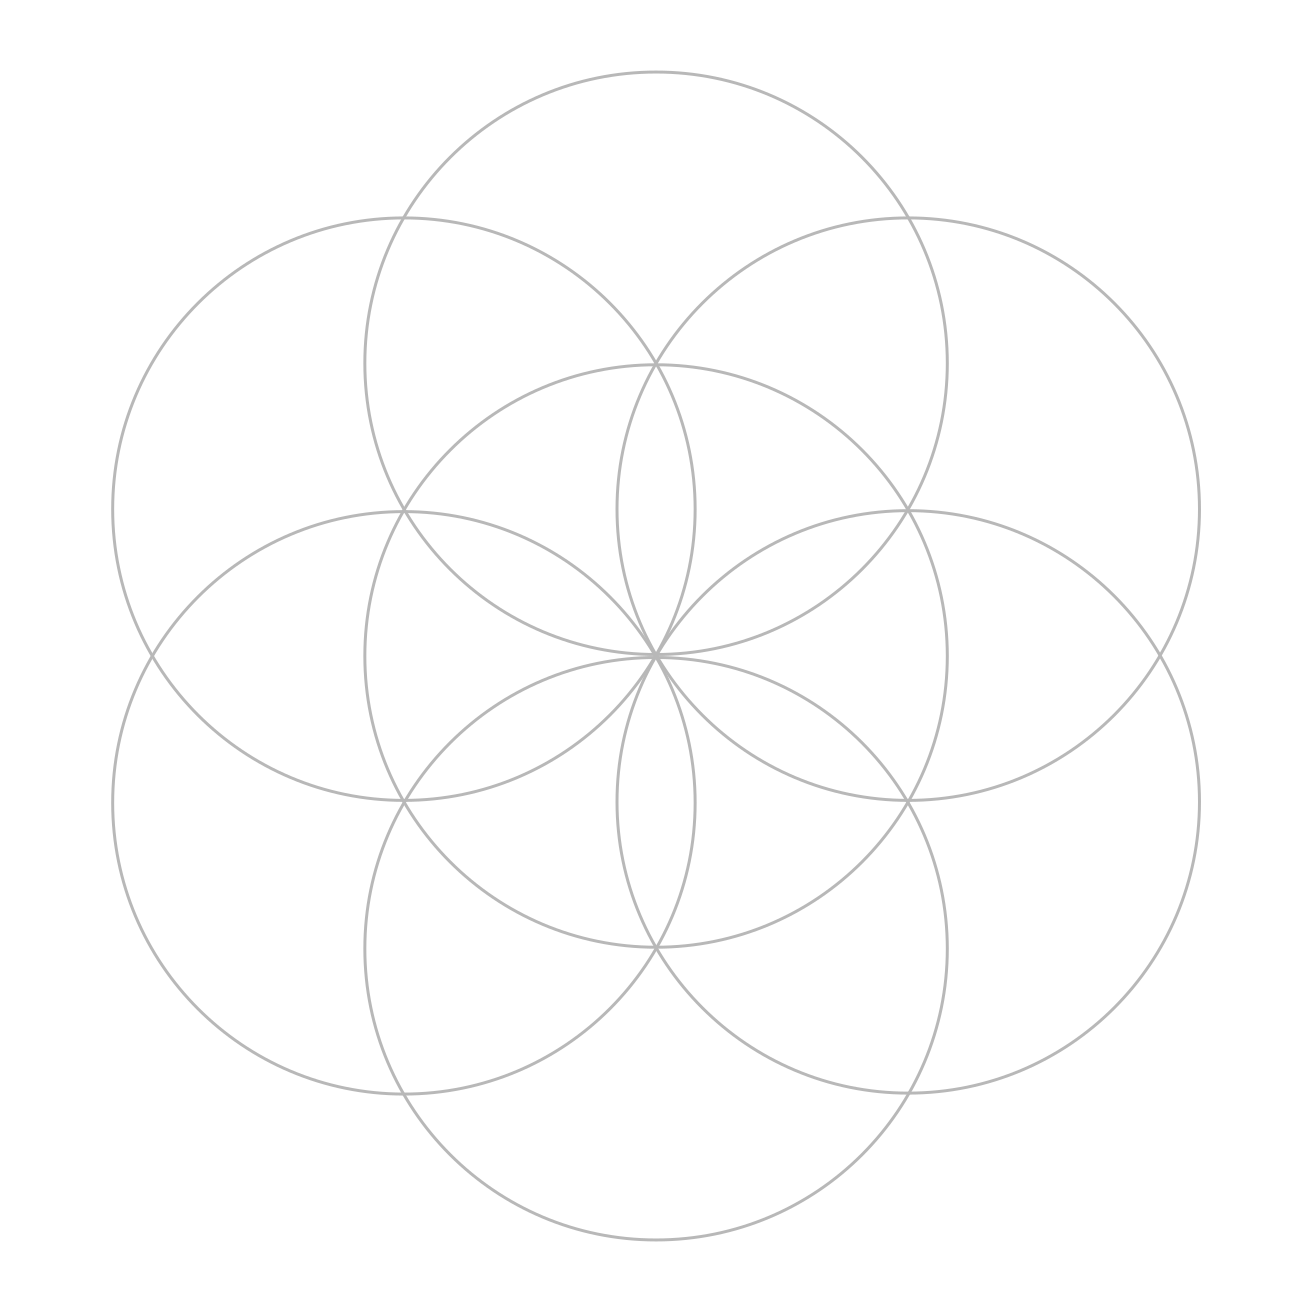
Got it? Excellent. Place it in front of you and take a moment to look at the circles, petals, crossings, and centre point.
Something is hiding in there. You’re going to find it.
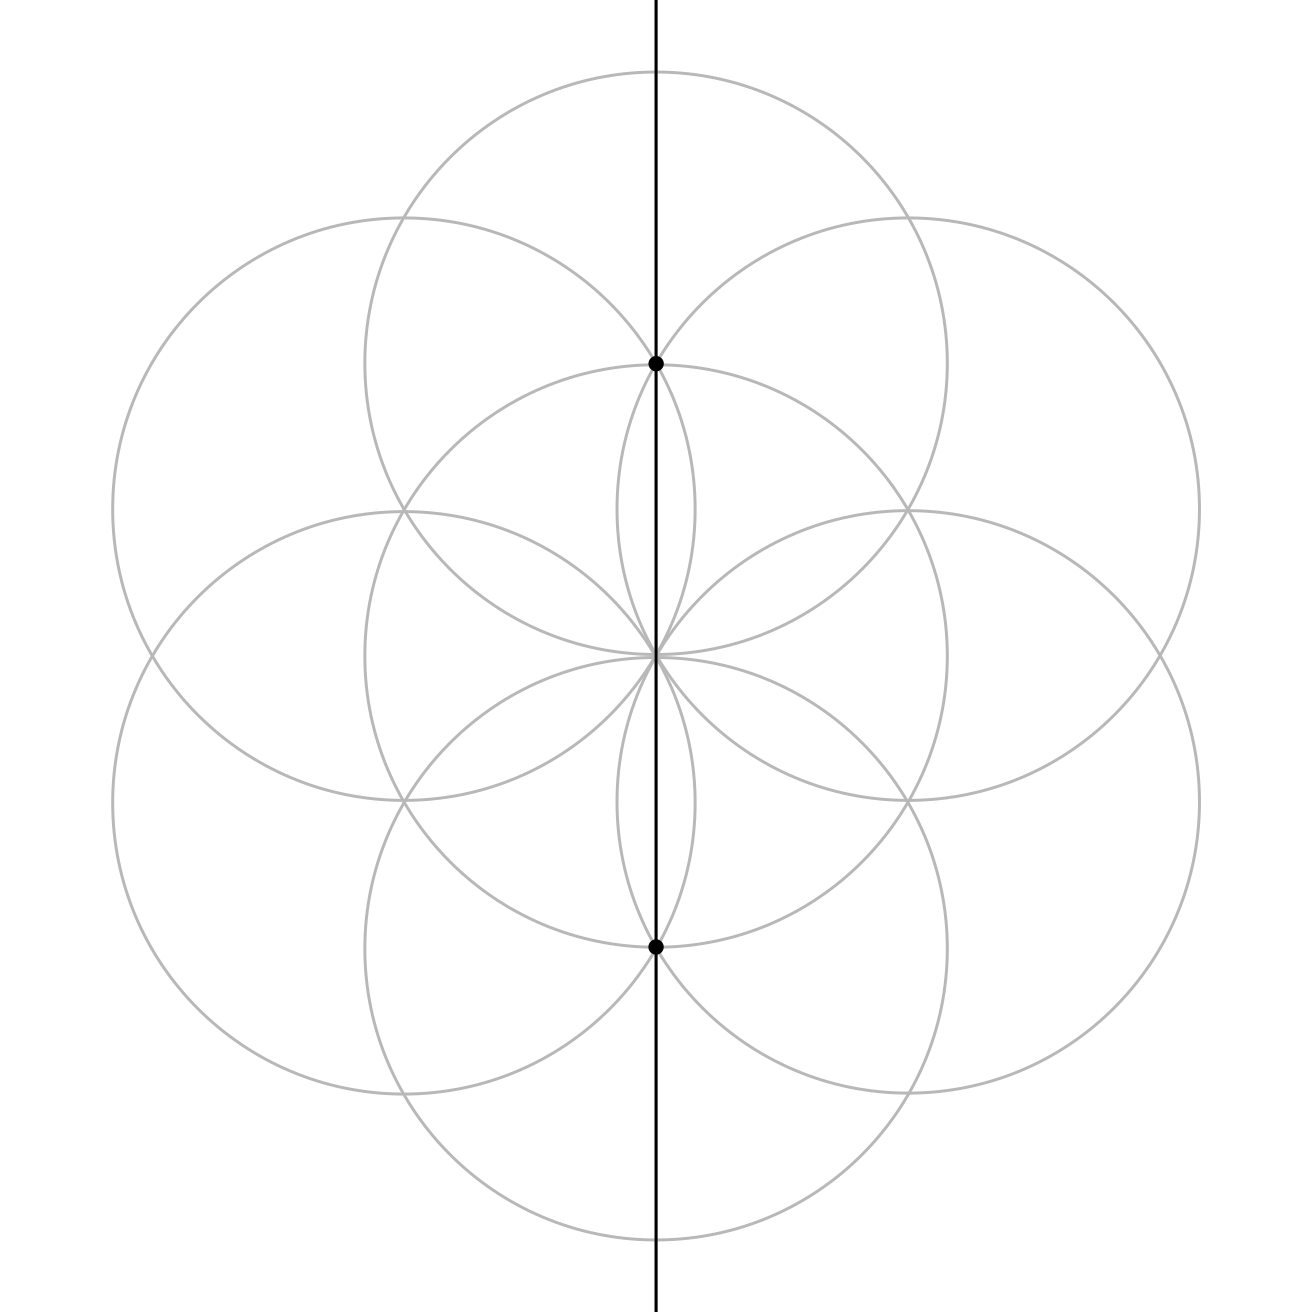
Draw the Vertical Centre Line
First up: find the vertical centre of the pattern.
Draw a straight line through the centre of the Seed of Life.
How? Look closely and you’ll find two nice intersections to help you. Find the right ones and… pop! Vertical line perfection.
Draw the Horizontal Centre Line
Now draw a straight horizontal line through the centre of the pattern.
Same story. Different intersections.
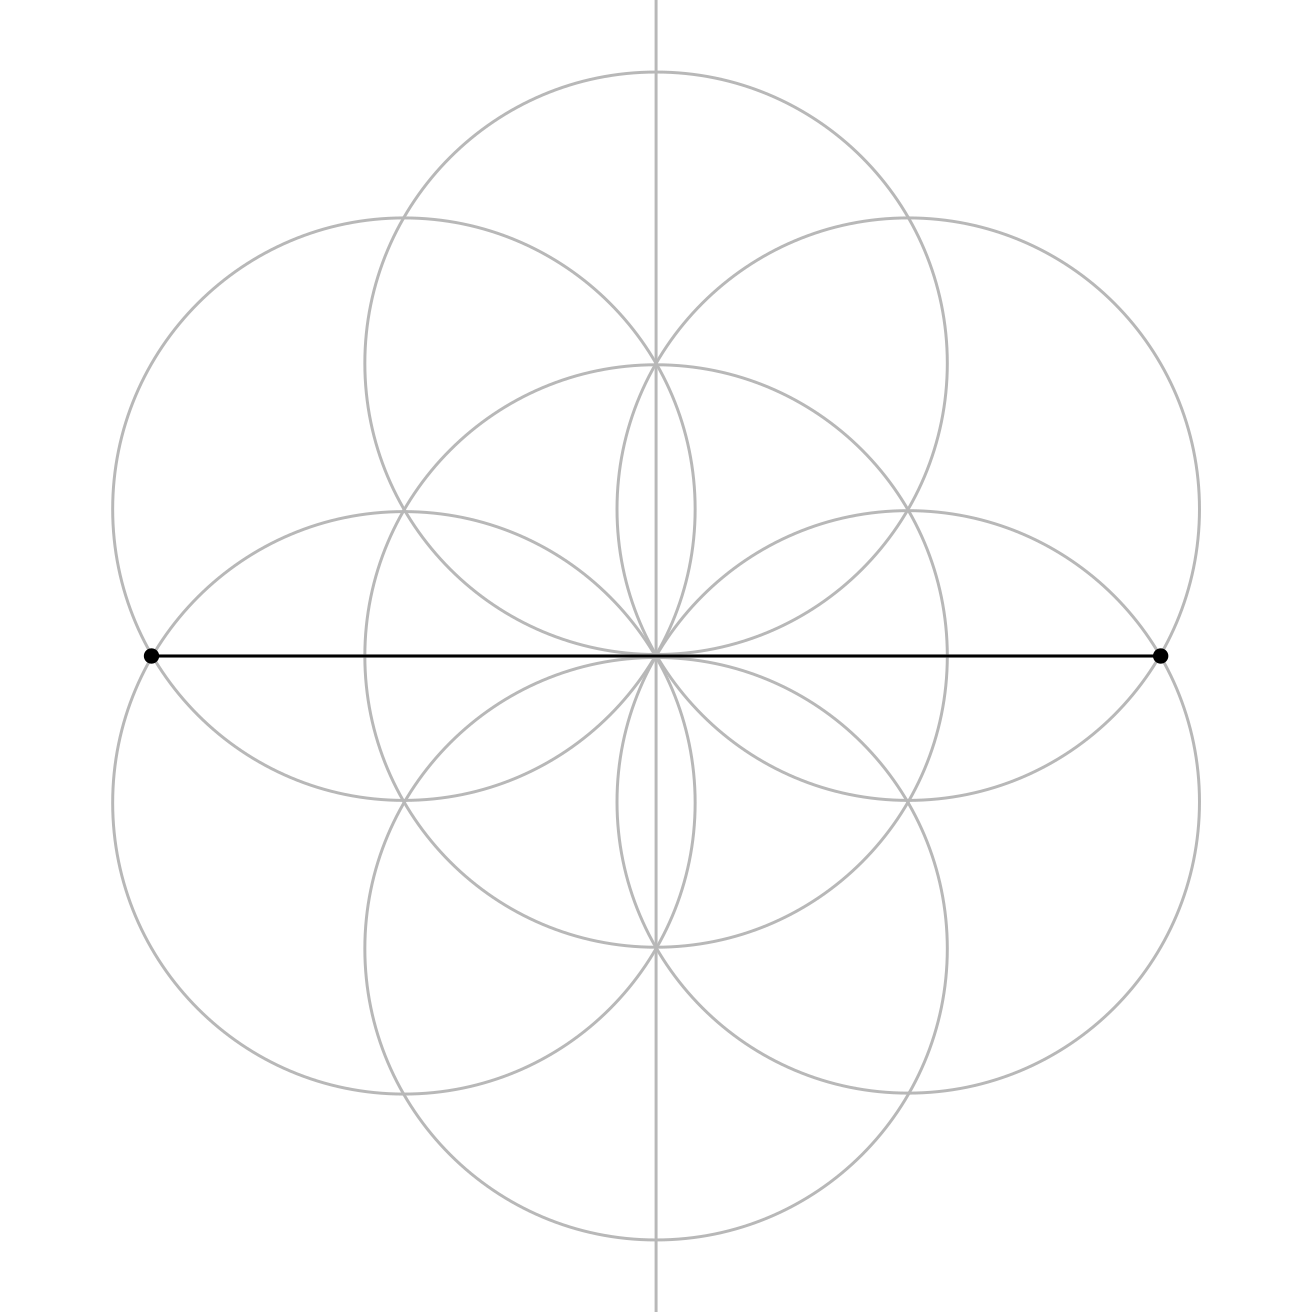
You now have two main directions: vertical and horizontal. Hurrah!
Add Left and Right Circles
Make sure your compass is set to the same width as the Seed of Life circles.
Use the left crossing of the horizontal line and centre circle to draw a circle. Then do the same on the right side.
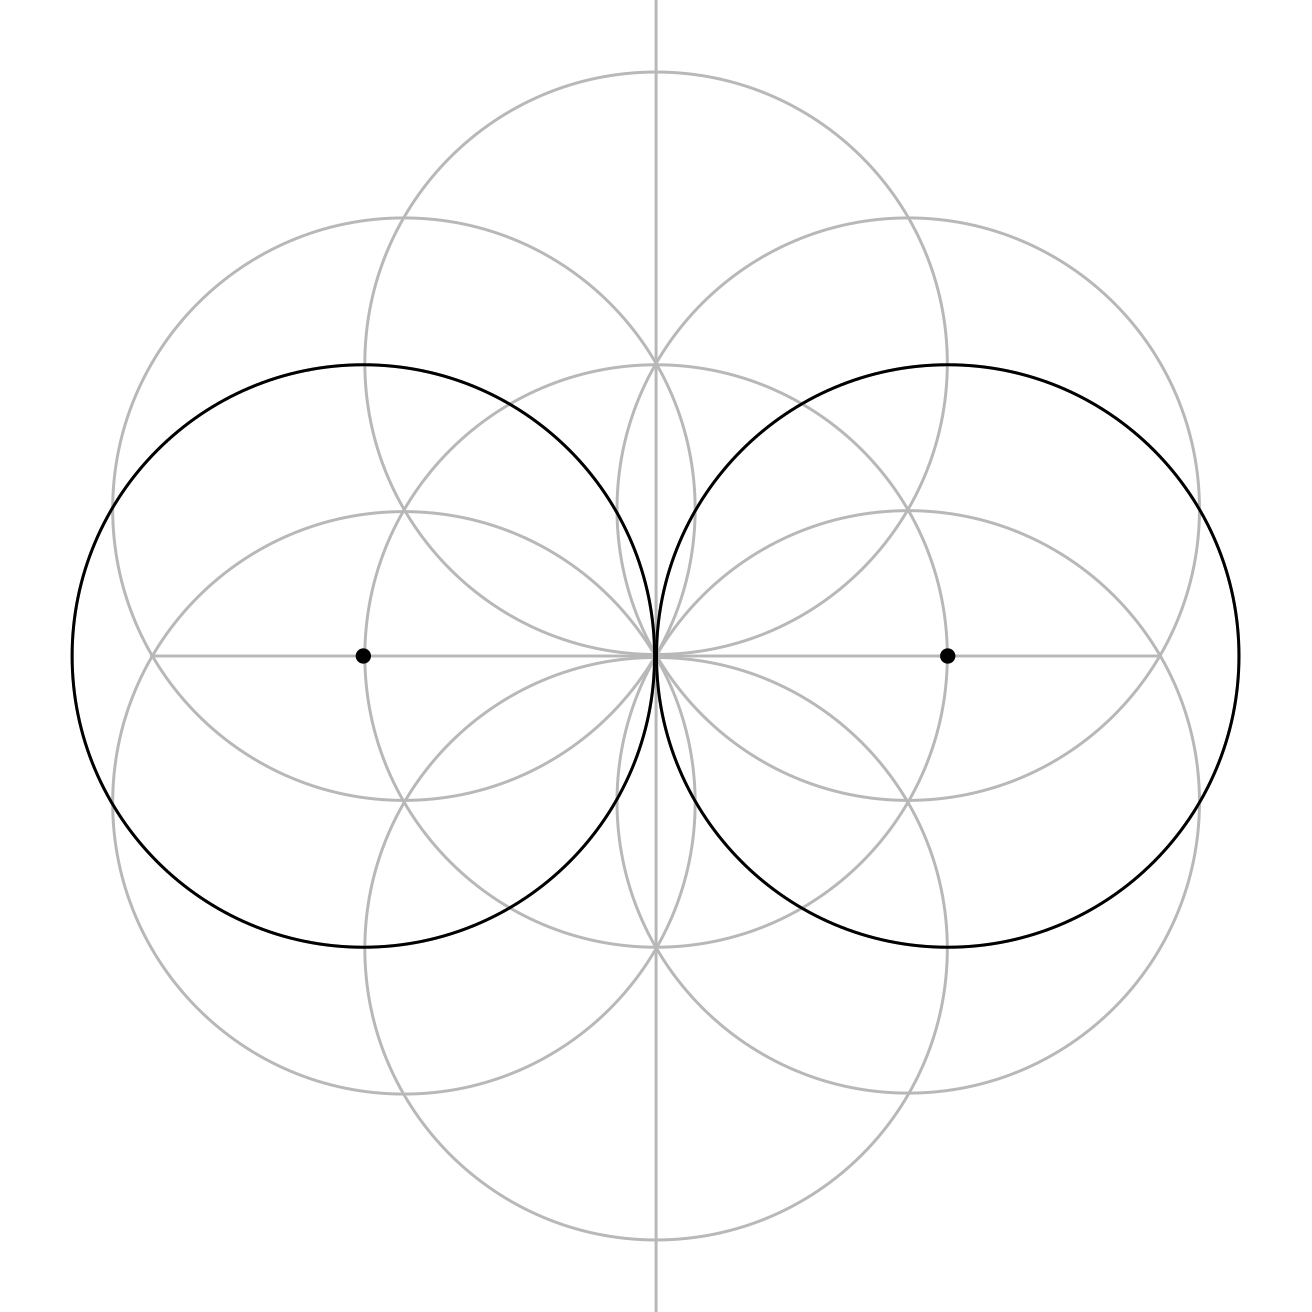
What are these for?
Keep going. You’re about to find out.
Create the Second Seed of Life
Now use the two new circles to complete a second Seed of Life nestled within the first.
Add four more circles using the same compass width.

Take It In
Pause for a moment and look at what you’ve built.
The original Seed of Life is still there. But now there’s another one snugly inside it.
Lovely!
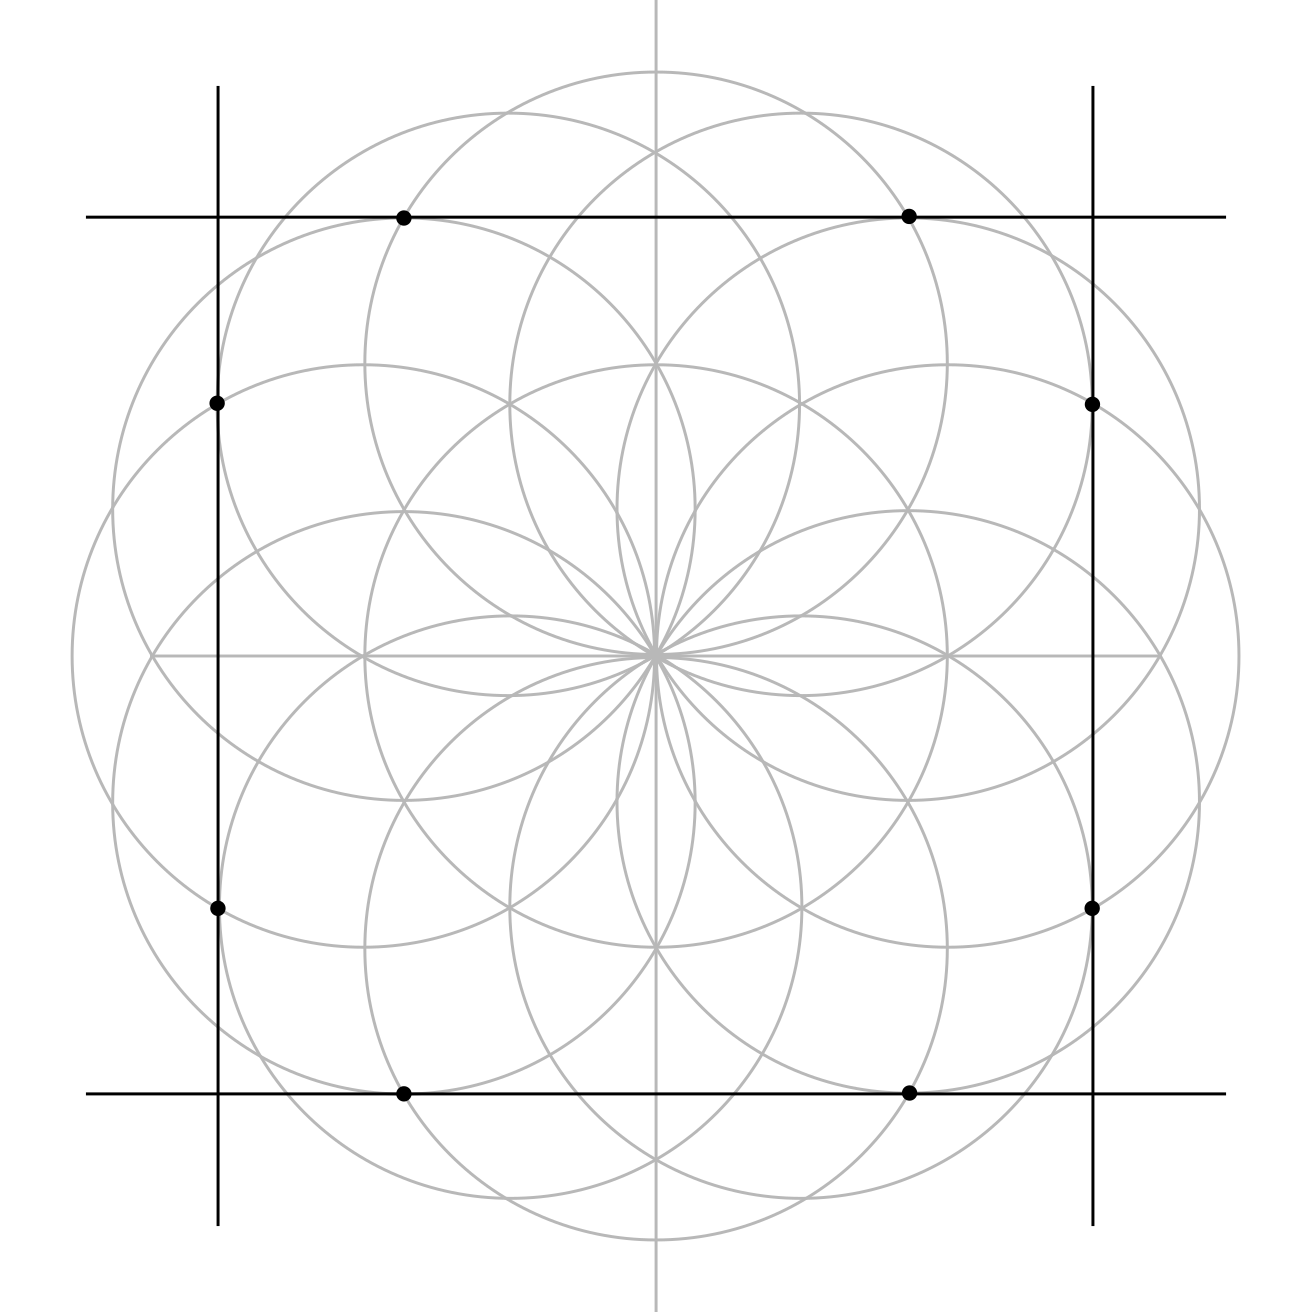
Draw the Outer Square
Look carefully for the marked crossings (dots).
Use these points to draw the four straight lines that reveal the outer square.
Draw the Inner Grid
But wait! There are more useful points. These ones show where the inner grid lines belong.
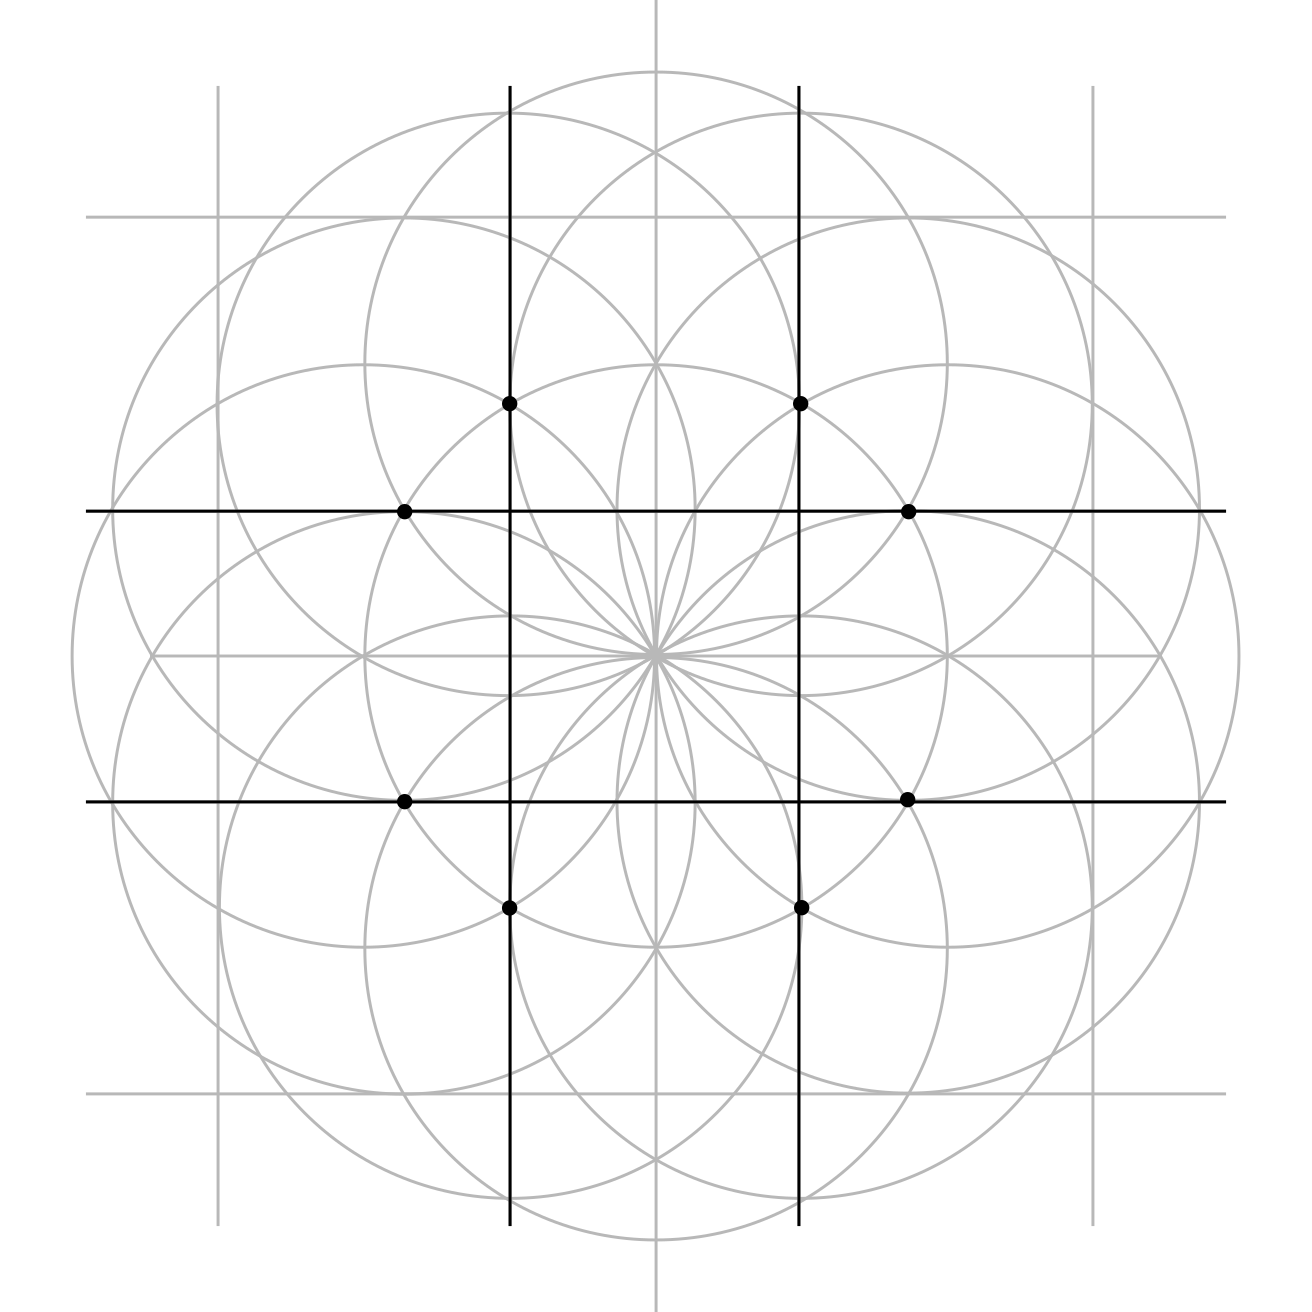
Together they divide the big square into nine equal spaces.
No hiding now. Everyone can see you, griddy.
Strengthen the Grid
Make it clearer for Biscuit by thickening the grid lines. Use a thicker pen, pencil, or colour, or even just press a little harder.
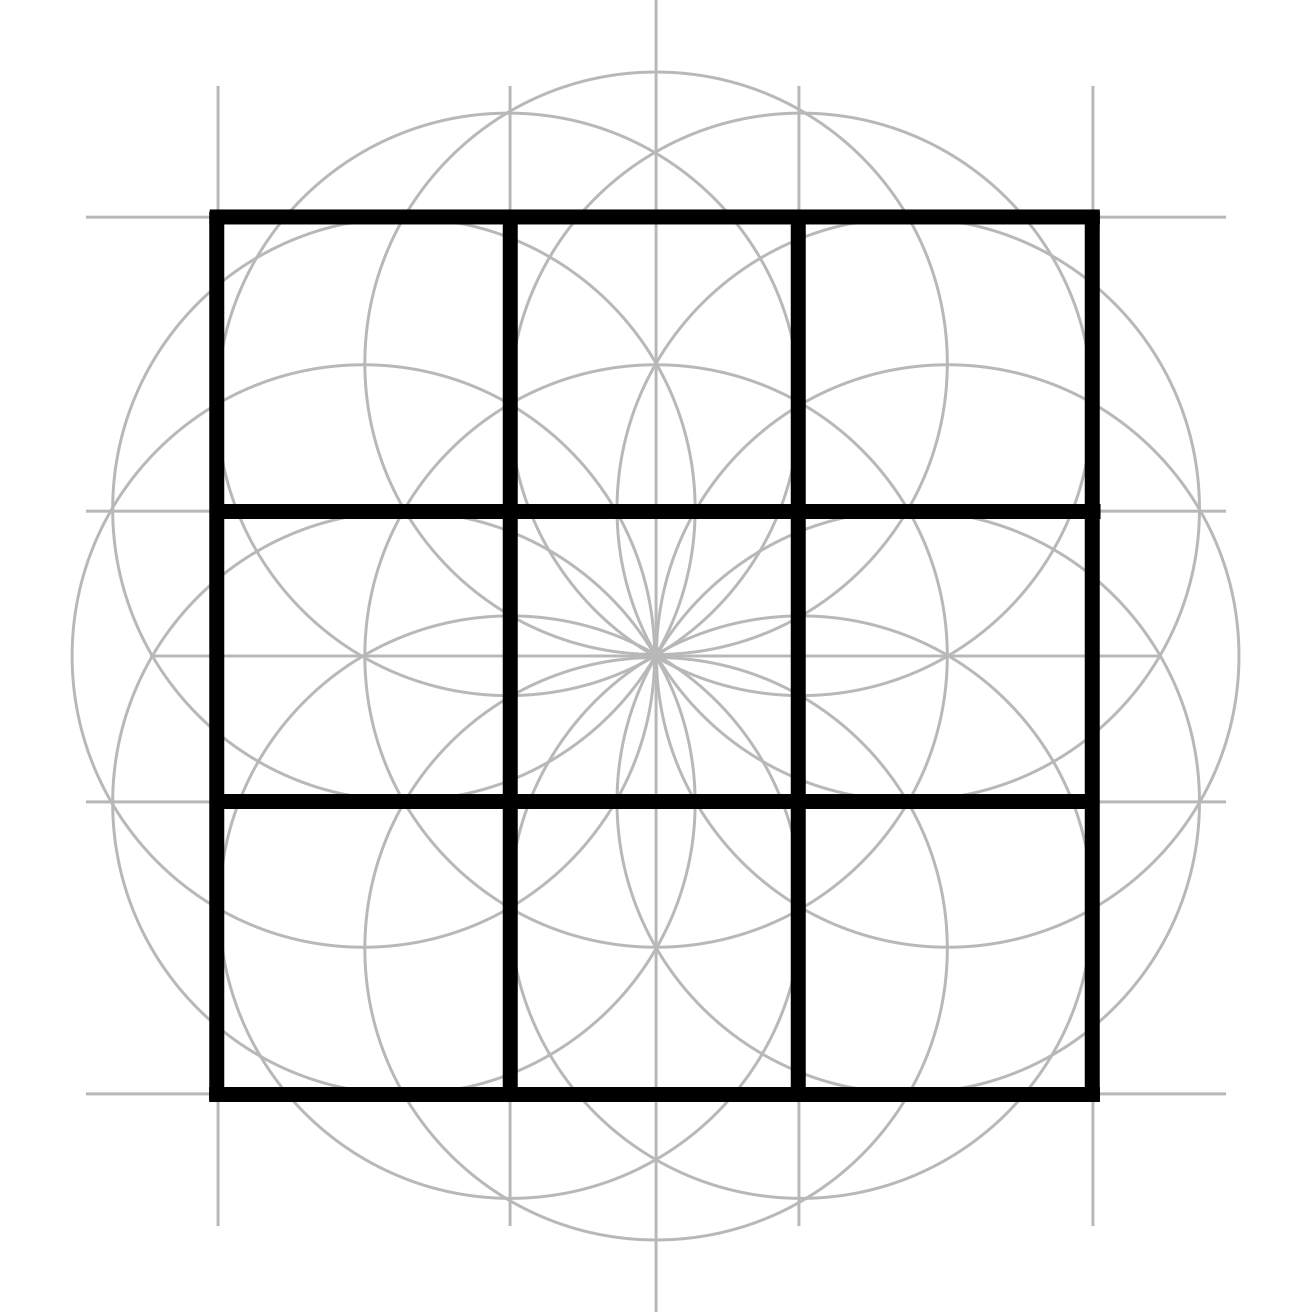
Congratulations! You’ve done the impossible: made a square grid out of circles.
Quality Control
If your grid doesn’t quite line up, good news: that’s exactly what practice is for. Check out the tool tips and try again.
Make It Yours
Colour it, pattern it, add a centre symbol, fill each square differently, or let one design wander across the whole grid. It's your grid and it's up to you!