

The Seed of Life
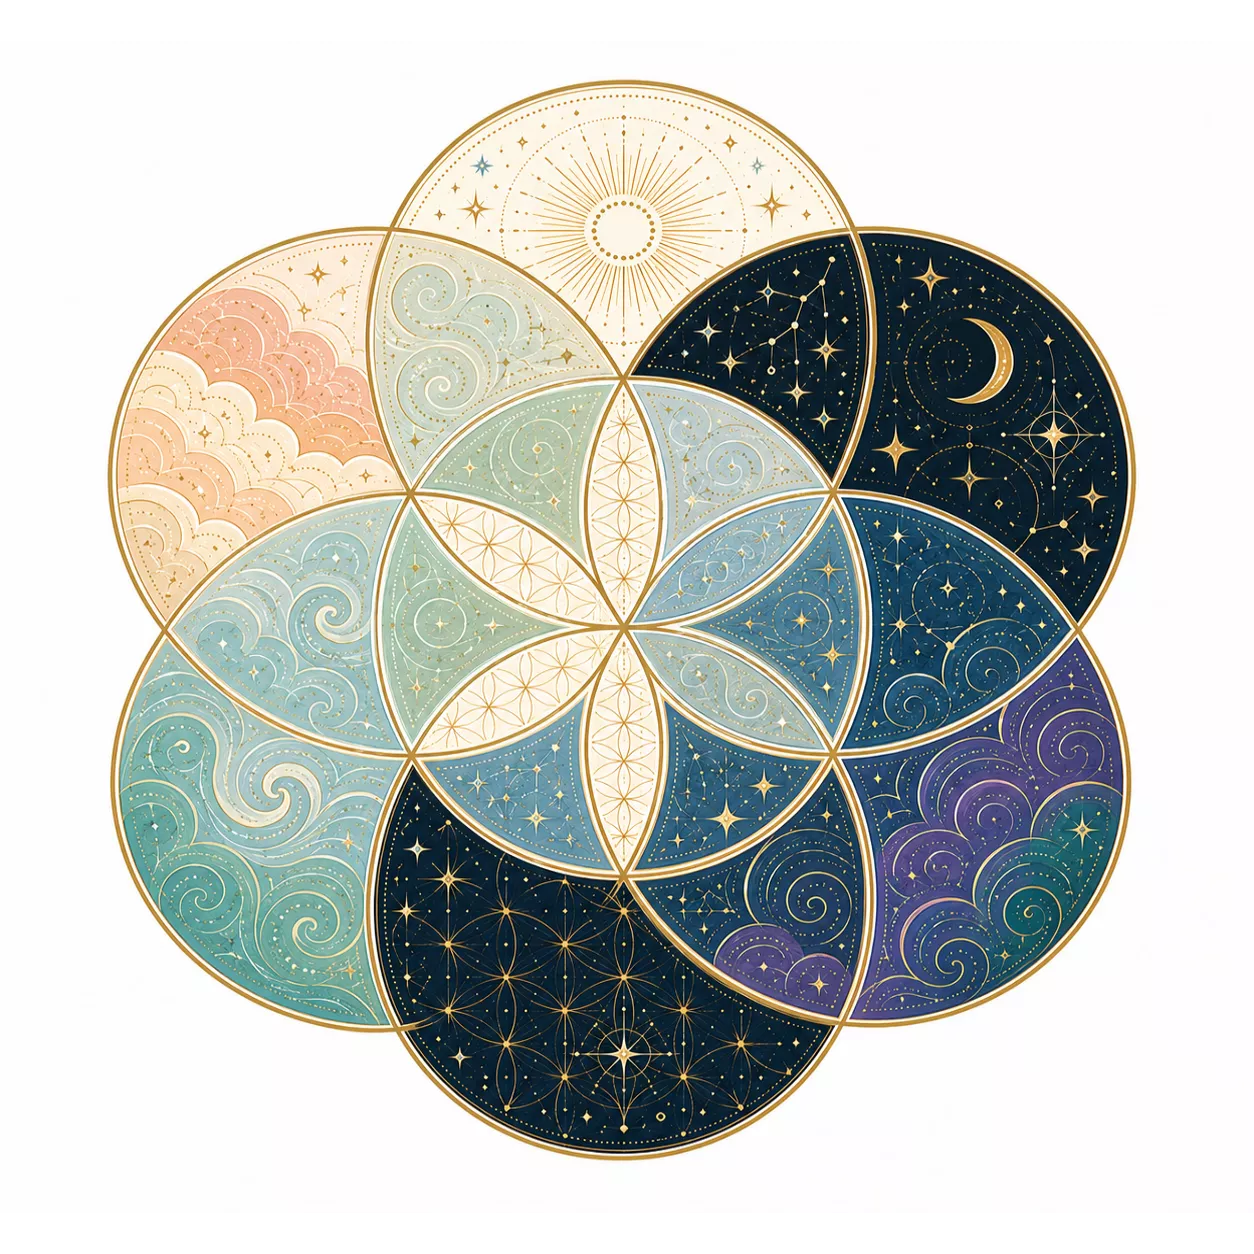

At a Glance
Get it. Print it. Make it.
The Seed of Life
In this task, you’re going to build a pattern from circles.
Just circles.
One circle leads to another. Then another. Then another.
Before long, a pattern begins to appear.
How?
Each new circle shows you where the next one belongs.
Smudge suspects the circles know what they’re doing.
Start with one circle, follow the clues, and see what appears.
The printable version gives you the construction to work through on paper at your own pace.
Need a hand with your compass or ruler? Check the Tool Tips before you begin.
Steps
Take a blank sheet of paper.
You’re about to build a Seed of Life from a single circle.
Ready?
Let’s begin.
Draw Your Guide Line
Use your ruler to draw a light vertical line down the page.
This is your guide line. It gives the first circle somewhere sensible to sit.

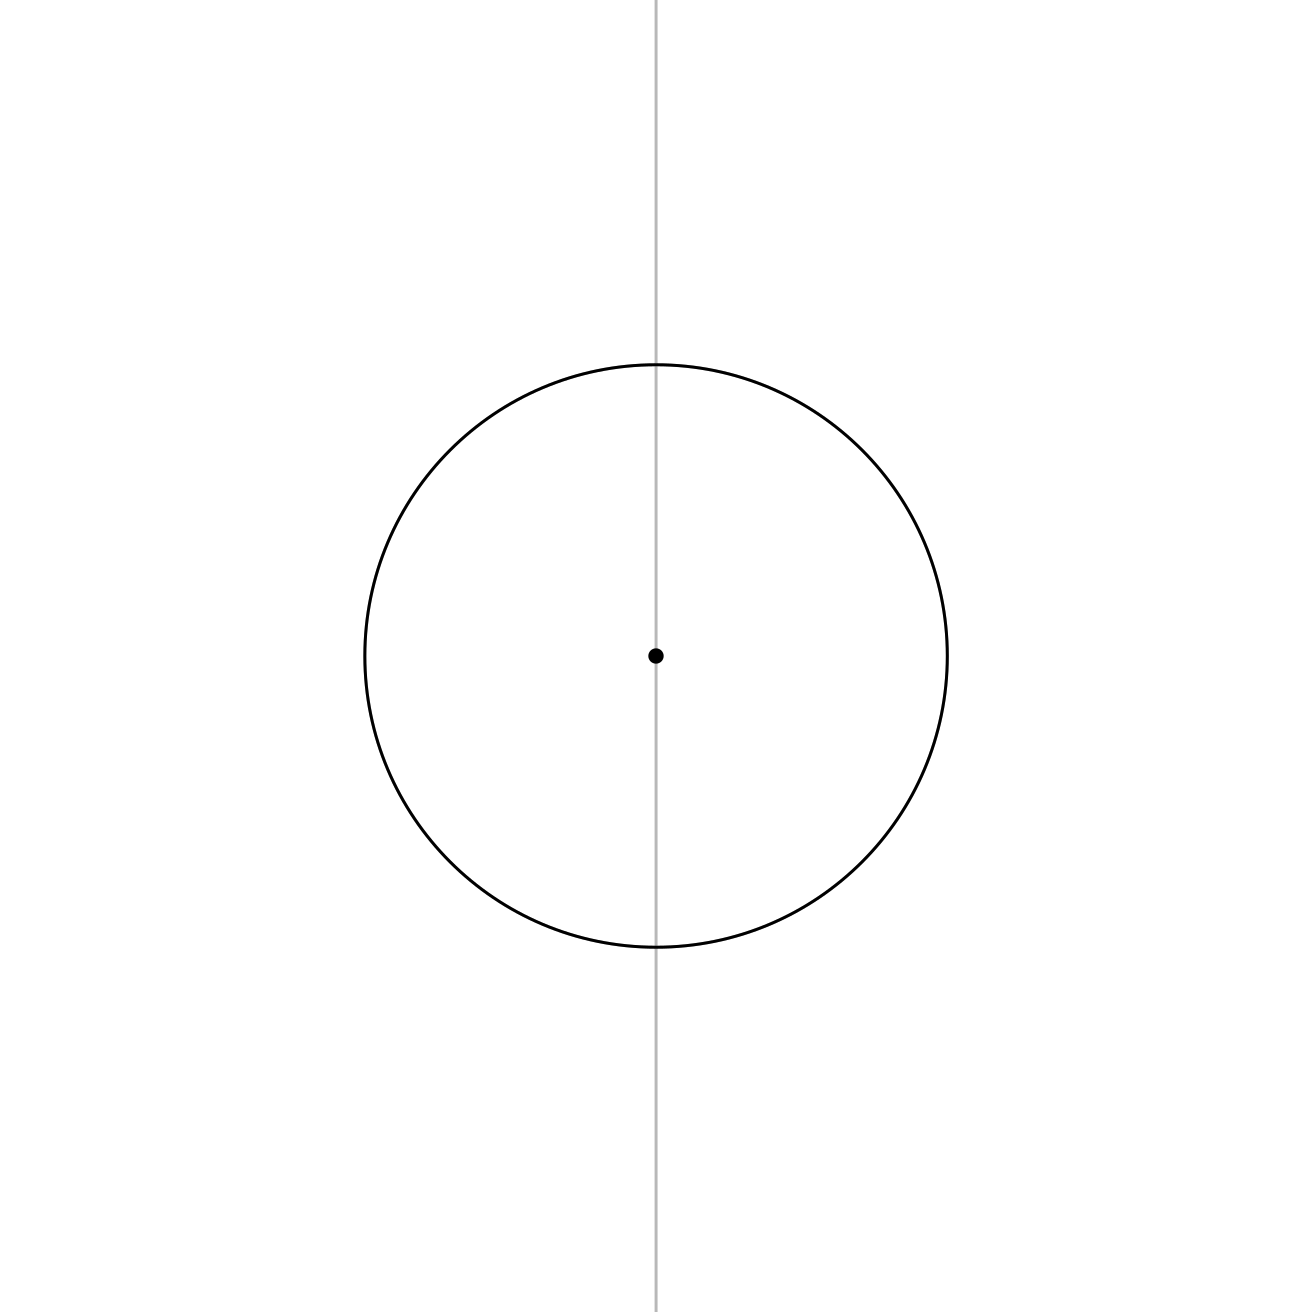
Draw the First Circle
Place the compass point roughly in the centre of the guide line.
Draw a circle.
This is the first circle. Every other circle in the Seed of Life will grow from this one.
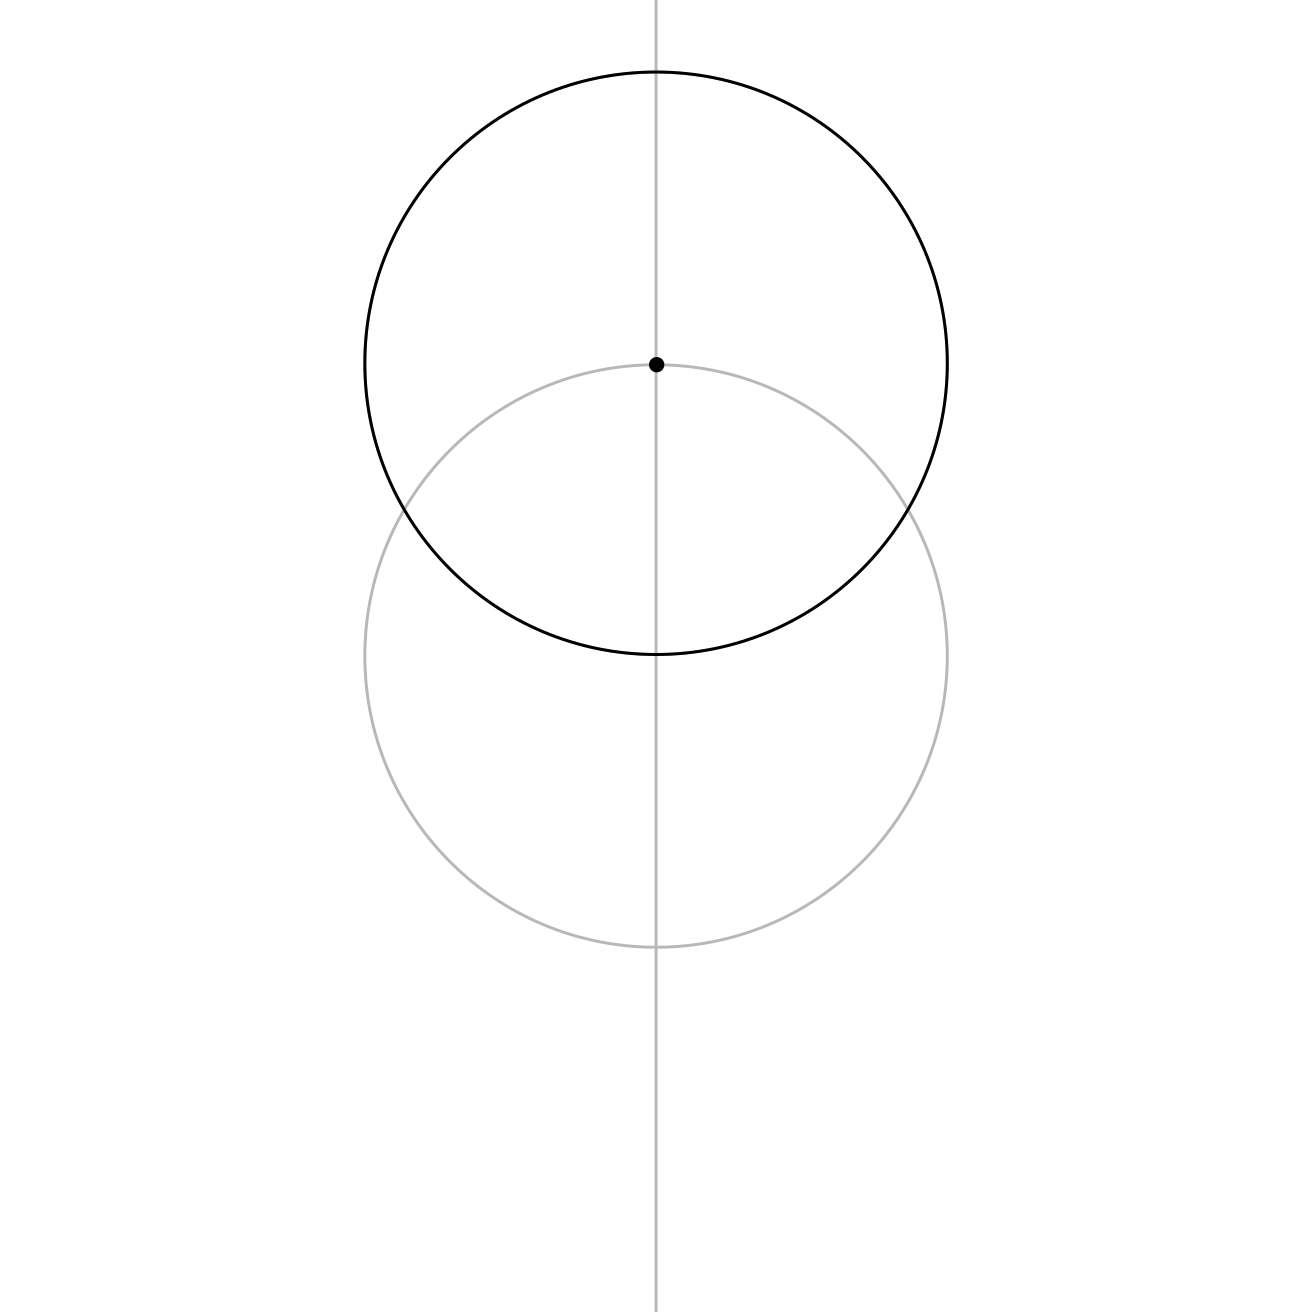
Draw the Top Circle
Place the compass point where the first circle crosses the guide line at the top.
Draw another circle using the same compass width.
Now the circles have started to show you where to go next.
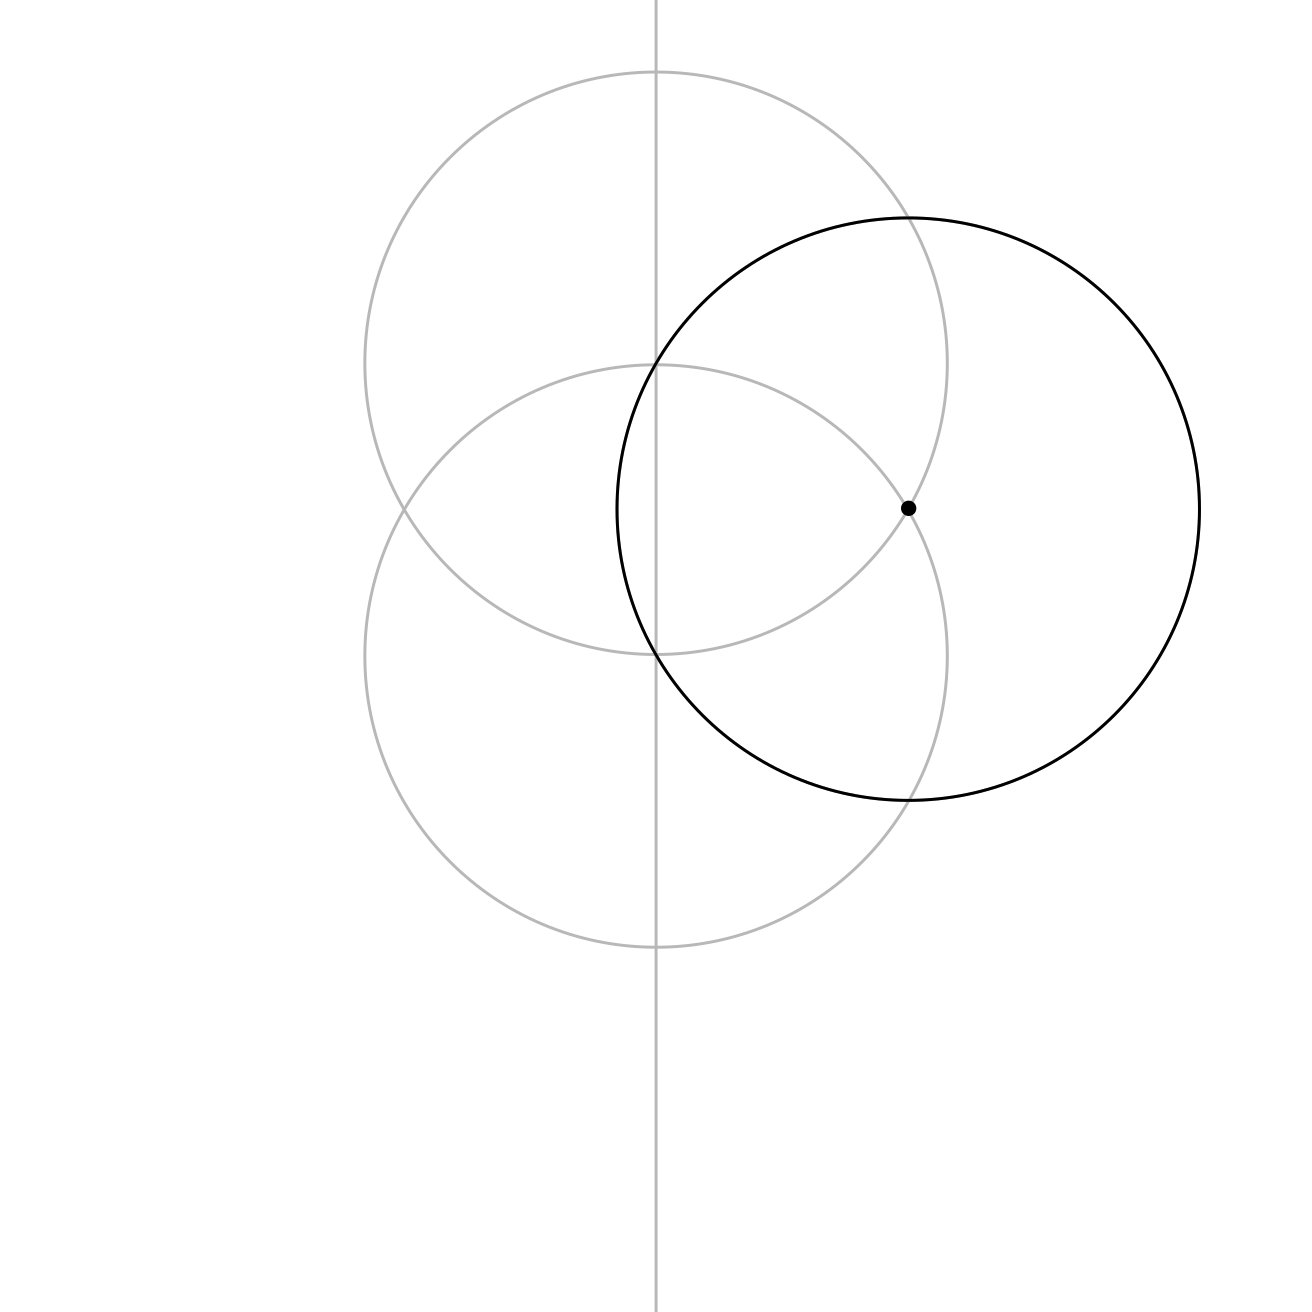
Draw the Upper-Right Circle
Look for the place where the two circles cross on the upper-right side.
Place the compass point there and draw another circle using the same compass width.
Draw the Next Circle
Move to the next crossing around the first circle.
Place the compass point there and draw another circle using the same compass width.
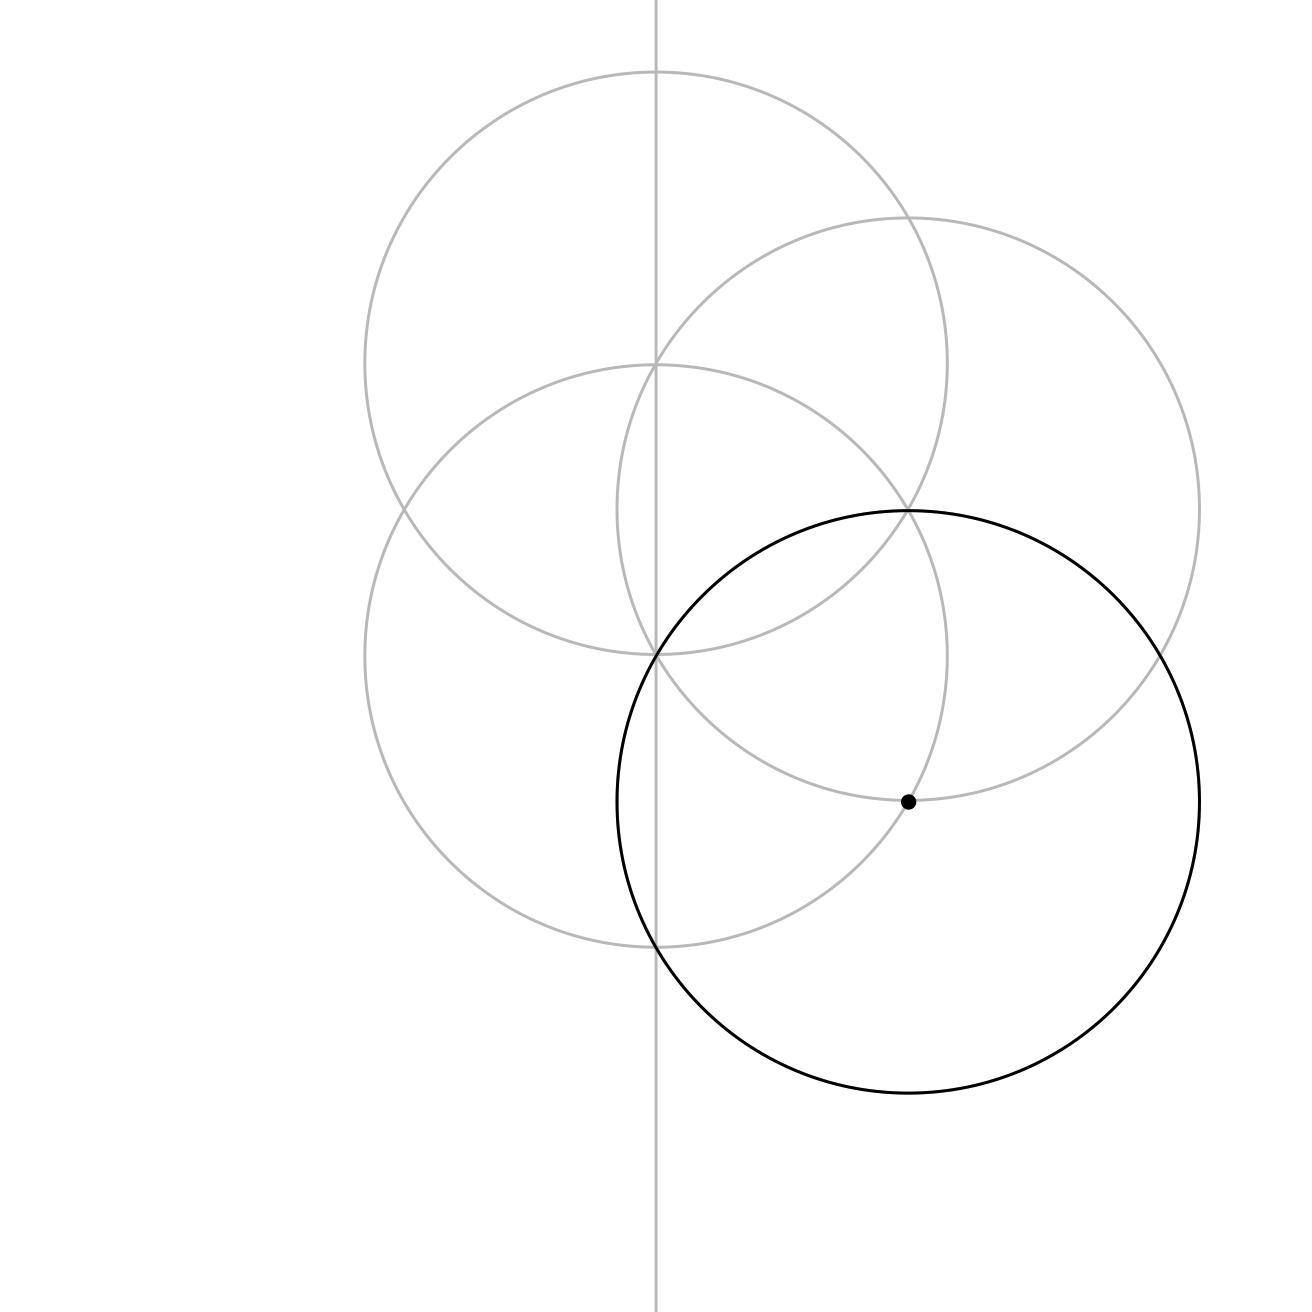
Keep Going Around the Circle
Once you’ve noticed the pattern, you can keep going.
Keep moving around the first circle, using each new crossing to place the next circle.
Remember to keep the compass width the same.
Continue around like a roundabout until the Seed of Life is complete.
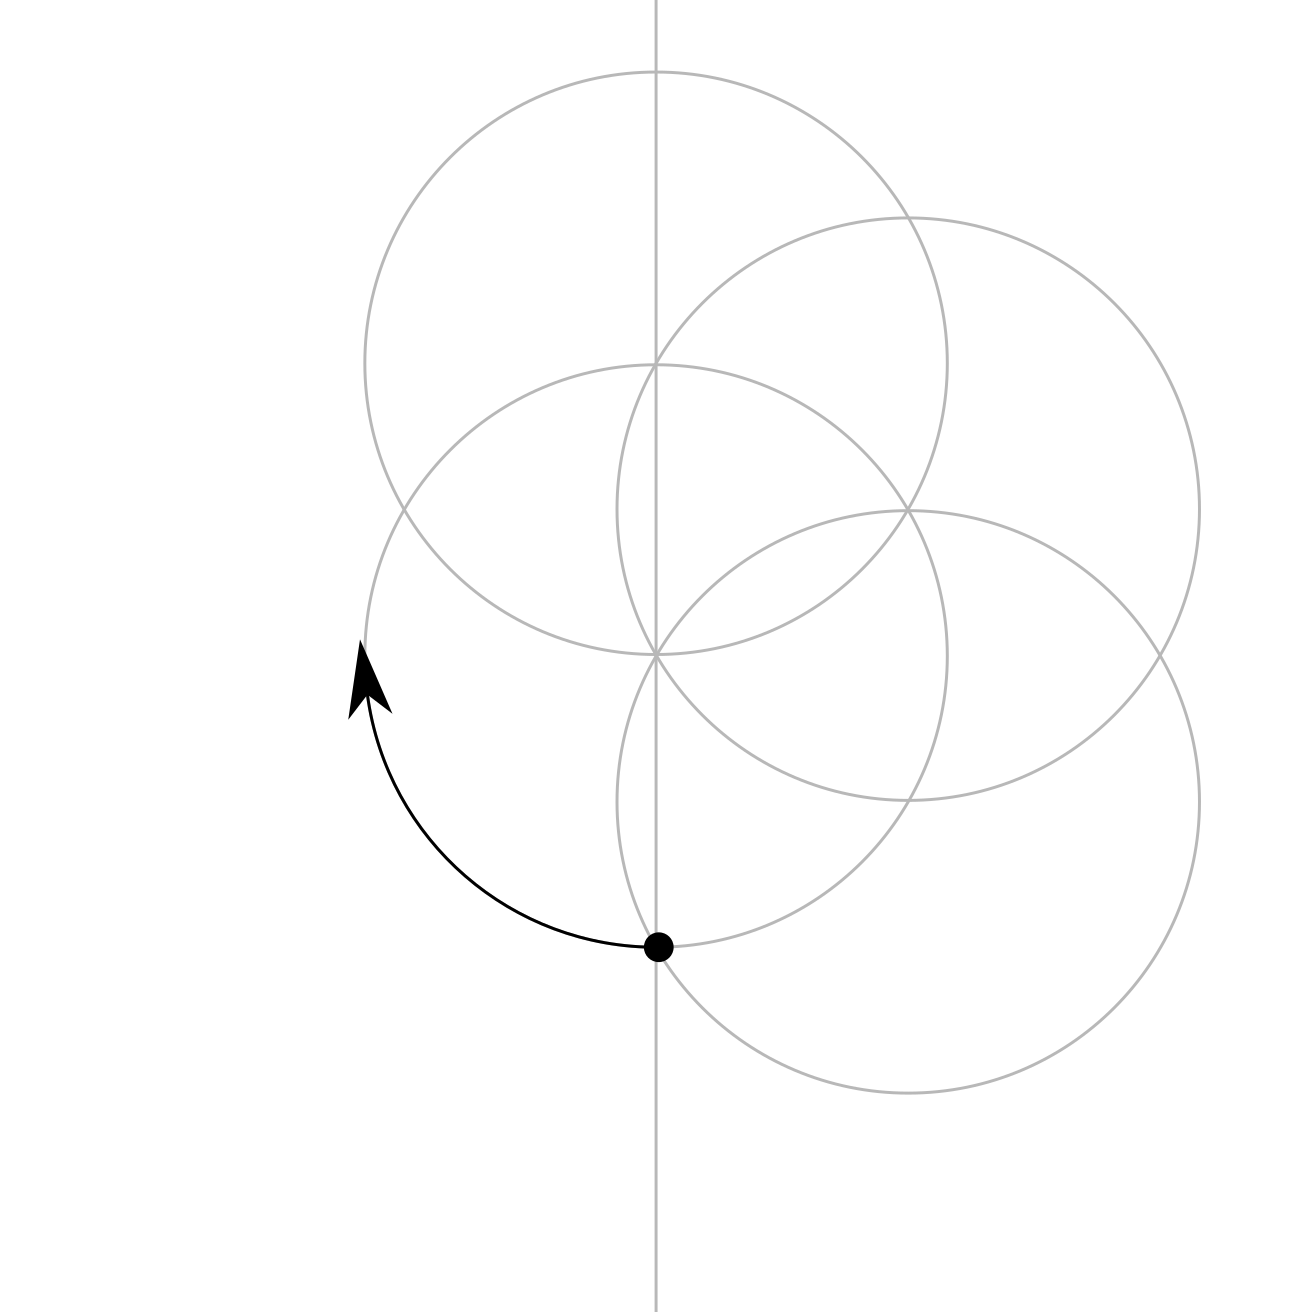
Take It In
Pause for a moment and look at what you’ve built.
You started with one circle. Now the Seed of Life has appeared.
Biscuit trusted the circles all along.
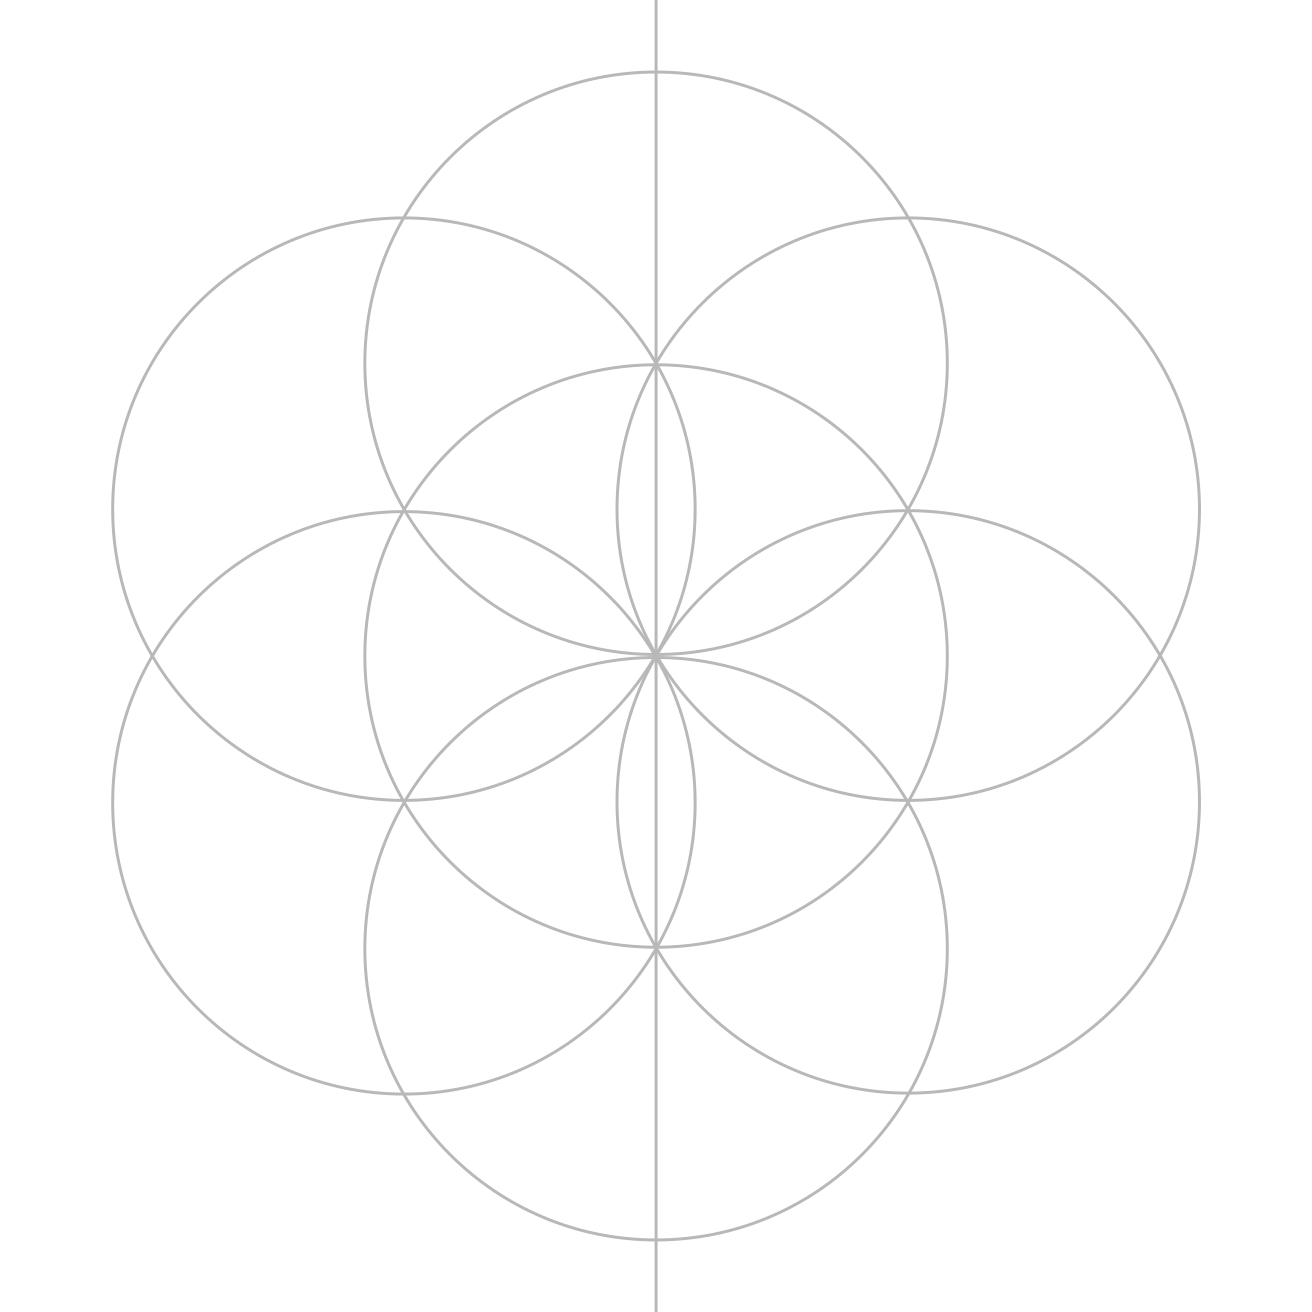
Tidy the Seed of Life
You can leave the construction as it is or strengthen the final circles.
You can keep the guide line or erase it.
It’s up to you, but it can be useful if you want to keep building.
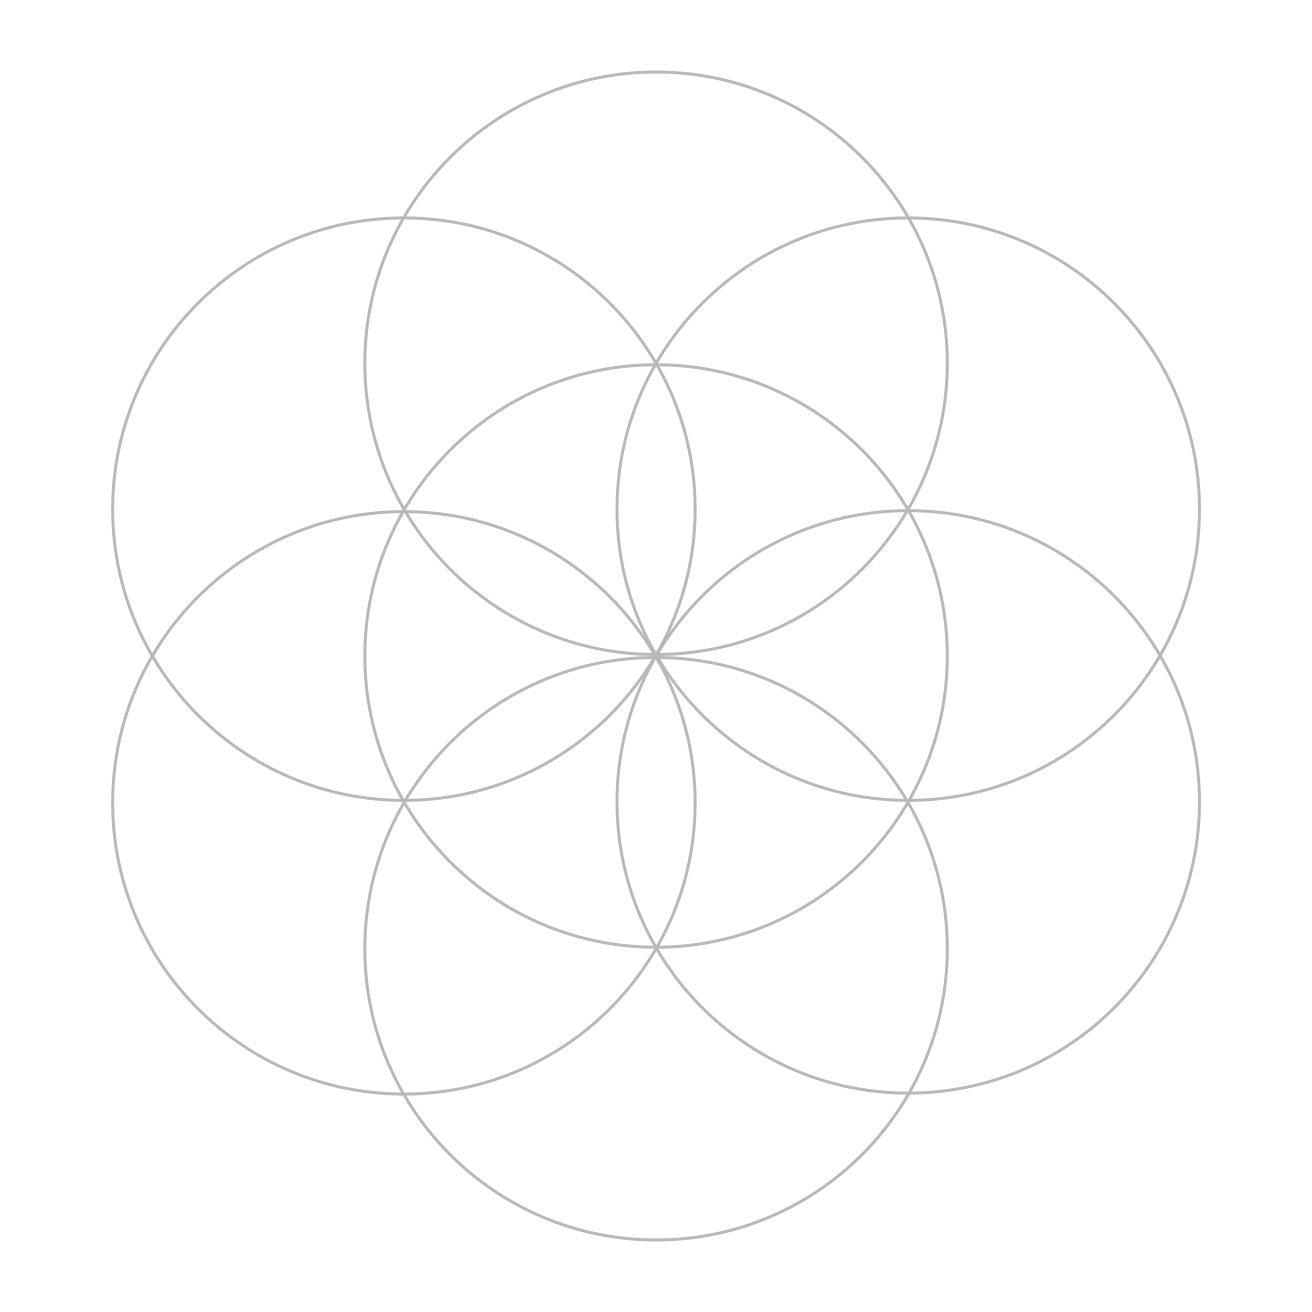
Need Another Go?
If your circles don’t line up neatly, good news: that’s exactly what practice is for. Check out the tool tips and try again.
Smudge calls this “getting closer.”
Make It Yours
Now make it yours.
Colour it, pattern it, turn it into a flower, or use it as the starting point for something completely different.
You can keep it simple or make it as detailed as you like.
Follow a pattern, invent a pattern, or see what happens when you make one up as you go.